Did you know that over 70% of Australian homes have tile roofs? This popularity comes with its own set of challenges when homeowners and installers want to add solar panels.
Tile roofs break easily, and each installation could damage your roof’s protection. On top of that, these roofs weigh a lot more than other options – a typical tile roof reaches up to 16 tons while metal roofing weighs just 1.2 tons. The roof’s weight becomes a crucial factor when you want to put solar panels on a concrete tile roof, and you’ll need a full picture of your structure’s strength.
Table of Contents
ToggleBut these challenges shouldn’t stop you. Solar installation on clay-tiled roofs costs more and carries more risk than other roof types. The good news is that proper installation can boost your home’s value by up to 4%, and homes with solar panels sell at better prices than those without.
This piece walks you through all you need to know about putting solar panels on your tile roof. You’ll learn how to tackle common problems and get expert safety tips that ensure your installation stays strong and leak-free.
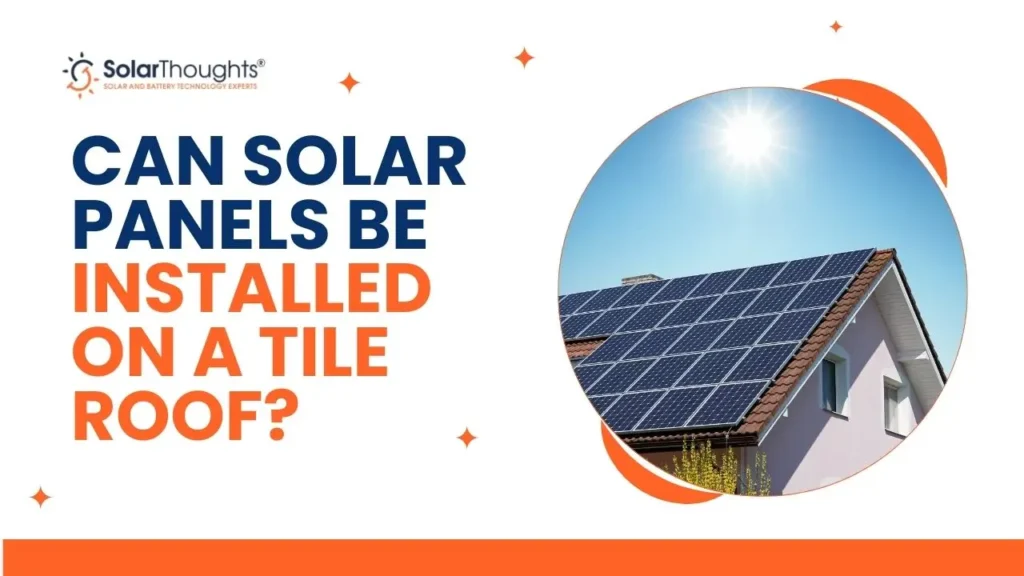
Can Solar Panels Be Installed on a Tile Roof?
You can definitely install solar panels on tile roofs. The process needs special techniques that you won’t find with other roofing materials.
Types of tile roofs: clay, concrete, terracotta
Tile roofs come in several types, and each one affects how you install solar panels:
- Clay/Terracotta tiles: These beautiful tiles come from the kiln in varying sizes and shapes, which makes them easy to break. You’ll see them everywhere in the American Southwest, and they can last up to 100 years.
- Concrete tiles: These tiles are tougher than clay and can handle more weight. Australian homeowners love them because they insulate well and don’t cost much.
- Lightweight tiles: These tiles weigh less than nine pounds per square foot and protect well against weather. They tend to crack under pressure.
Why tile roofs are more complex than others
Solar installation on tile roofs brings its own set of challenges. Tiles cost more and break more easily than metal or composite shingle roofs. The waterproof barrier of your roof might get compromised when installers remove tiles to put in mounting brackets.
The job takes longer on tile roofs. Installers can’t see the roof timber right away, so they need extra time to measure everything. They must grind terracotta tiles instead of chipping them to avoid breakage.
Waterproofing creates another challenge. Holes in tiles and underlayment can reduce how well your roof keeps water out. The fancy designs on tile roofs also limit where you can place solar panels.
Common myths about tile roof installations
Your tile roof can handle solar panels just fine. A well-maintained roof supports panels without any structural problems.
Some people think solar installation will damage their roof. Good installers know how to work with tiles and minimize breakage. Keep some extra tiles handy during installation, just in case.
People often think tile roofs can’t support solar panel systems. The truth is, concrete and terracotta tiles stand up to harsh weather conditions. This makes them great for mounting panels if done right.
Step-by-Step Installation Process
Solar panel installation on tile roofs takes 1-3 days based on system size and complexity. You should know what each stage involves before the work begins.
1. Roof inspection and measurements
A successful installation starts with getting a full picture. Your roof needs an assessment either remotely or in person so installers can find the best panel spots based on space, pitch, and orientation. This key step helps spot any roof condition or access problems before the work starts. Inspectors check tile fragility and structural strength to avoid future issues.
2. Removing tiles to access rafters
The team removes specific tiles after completing measurements that match the required railing length. Some installers might reinforce your roof cavity to create extra mounting points. Keep spare tiles ready since breaks can happen despite careful handling.
3. Installing mounting brackets and rails
Installers attach stainless steel mounting brackets securely to the structural supports after accessing rafters. Your tiles go back in place, but they need grinding or cutting to fit around new brackets. Quality teams use diamond wheel grinders instead of hammers which could damage tiles. Aluminum alloy rails attach to these brackets and are the foundations for your solar array.
4. Placing and securing solar panels
The rail system holds panels with special clips that bolt onto panel edges and slide into metal rails. These clips make panel removal easy when maintenance is needed underneath. Each panel lines up perfectly to work at its best.
5. Electrical wiring and inverter setup
Power cables connect under panels to create a “string”. This string runs under a tile through a roof opening to reach the inverter. Most installers place inverters on shaded external walls or in garages near switchboards. The final step connects the inverter to your home’s electrical system with an added circuit breaker for safety.
Challenges of Installing on Tile Roofs
Solar panel installation on tile roofs comes with its own set of challenges. These challenges affect the quality, durability, and cost of installation.
1. Fragility and risk of tile breakage
Tile roofs break easily under pressure, especially the lightweight cement, clay, and terracotta varieties. Even skilled installers find it hard to work on these surfaces without causing damage. Installers often call terracotta tiles “TERRORcotta” because they’re so brittle. You should keep spare tiles handy on installation day since the extra 20kg of weight per footstep can break tiles quickly during panel placement.
2. Increased labor time and cost
Tile roofs take much longer to work with because they’re so delicate. A standard 6.6kW installation needs about 4 extra hours just to grind tiles properly. This extra work means higher costs – installers charge premium rates for tile roof jobs. You’ll also need special tools, mounting systems, and replacement tiles, which add to the final price.
3. Waterproofing and leak prevention
The roof must stay watertight during the whole process. Every mounting point needs proper sealing to keep water out. Poorly ground tiles leave gaps where water can seep into ceiling spaces. The Clean Energy Council makes it clear: “tiles shall sit flat after installation of mounting brackets to ensure original ingress protection”.
4. Limited access and roof space
Tile roof designs limit where you can install panels. You can’t touch the hips and ridges without doing lots of extra work. Each section loses about 600mm because the edge areas won’t hold mounting hardware. This means you might end up with a smaller system that generates less power.
5. Impact of roof age and condition
Old tile roofs need a thorough check and possible repairs before installation starts. If you install solar on an aging roof, you’ll have to remove panels later for roof maintenance – this costs extra money. The roof’s structure needs a good review, especially older ones, to make sure they can handle the extra weight.
Expert Tips for a Safe and Durable Installation
Professional installation makes all the difference between a long-lasting solar system and potential roof damage. Here are expert recommendations that will give you optimal results.
1. Use of tile replacement mounts or double flashing
Tile replacement mounts give you a better solution for tile roof installations by replacing individual tiles with specially designed mounts. These mounts work better than traditional methods because they’re flashed at both deck and tile levels. They feature Elevated Water Seal Technology® that gives optimal waterproofing. Double flashing works great for clay tile roofs and stops the rattling and cracking you often see with hook systems.
2. Importance of grinding tiles properly
Your roof’s integrity depends on proper tile grinding. Clean Energy Council installation guidelines require this practice. Diamond wheel grinders create precise channels for mounting brackets so tiles sit flush after installation. This step prevents future cracks and leaks that happen when tiles rest directly on mounting brackets.
3. Why should spare tiles be on hand
You’ll need at least 12 spare tiles on installation day because even skilled installers break some tiles. Concrete and terracotta tiles crack easily under foot traffic, especially when you have the extra 20kg per footfall during panel placement. Older tiles become more brittle, so you might need replacements, whatever the installer’s skill level.
4. Choosing experienced solar installers
Look for contractors with Clean Energy Council accreditation. Quality installers use wet diamond cutting tools instead of rough methods that damage tiles. On top of that, make sure at least one certified installer stays on-site during setup, mid-installation inspection, and final commissioning.
5. How to avoid common installation mistakes
Waterproofing fails without proper installation of dektites or collar flashing where cables go through the roof. Water damages electrical components easily, even those under panels. Mounting brackets need to let tiles sit completely flat to prevent gaps where water might enter.
Conclusion
Installing solar panels on a tile roof definitely creates unique challenges compared to other roofing materials. In spite of that, your tile roof can safely support a solar system that lasts for decades with proper planning and expert installation.
Tile roof installations need specialized techniques because of their fragility and waterproofing needs. Project success depends on choosing an experienced installer with specific tile roof expertise. These professionals know the right way to grind tiles, use appropriate mounting hardware, and ensure meticulous waterproofing to prevent leaks.
The process takes more time and money than standard installations, but the long-term benefits make up for these initial challenges. A properly installed solar system can boost your home’s value by up to 4% and provide clean energy for decades. On top of that, it can last just as long as installations on other materials when done right.
Keep spare tiles handy during installation, check your installer’s credentials, and make sure they use proper grinding techniques instead of rough chipping methods. Your tile roof solar installation needs extra care, but it’s a solid investment for your home. Expert execution and careful planning let you enjoy all the benefits of solar power while your roof’s beauty and integrity stay intact.
FAQs
Q1. Is it possible to install solar panels on a tile roof?
Yes, solar panels can be installed on tile roofs, including clay, concrete, and terracotta tiles. However, the process requires specialized techniques and considerations due to the fragility and complexity of tile roofs.
Q2. How long does it take to install solar panels on a tile roof?
The installation process on a tile roof typically takes 1-3 days, depending on the system size and complexity. It generally takes longer than installations on other roof types due to the careful handling required for tiles.
Q3. Are there any risks associated with installing solar panels on a tile roof?
The main risks include potential tile breakage, compromised waterproofing, and increased installation costs. However, these risks can be mitigated by choosing experienced installers who use proper techniques and equipment.
Q4. What should I consider before installing solar panels on my tile roof?
Consider the age and condition of your roof, have it professionally inspected, ensure you have spare tiles on hand, and choose a certified installer with experience in tile roof installations. Also, be prepared for potentially higher costs compared to other roof types.
Q5. Can solar panel installation damage my tile roof?
While there is a risk of tile breakage during installation, experienced installers using proper techniques can minimize this risk. Proper grinding of tiles, use of specialized mounting systems, and careful handling can help preserve the integrity of your roof.
Our Popular Services
Top-rated solar panels company in Brisbane | Solar Panel Installation in Gold Coast | Upgrading existing Solar system | Solar Panel Repairs and Maintenance | Solar Panel Cleaning Service | Solar Battery Installations | Solar Inverter Installations